
ComfyUI Extension: Niutonian_Comfyui_Philips_Hue
Run ComfyUI workflows without the setup
No installs, no CUDA version roulette, no GPU sitting idle on your bill. Bring a workflow and run it in the browser.
ComfyUI custom nodes that sample the edge colors of generated images and send matching colors to Philips Hue lights or Hue light strips.
Looking for a different extension?
Custom Nodes (4)
README
Niutonian_Comfyui_Philips_Hue
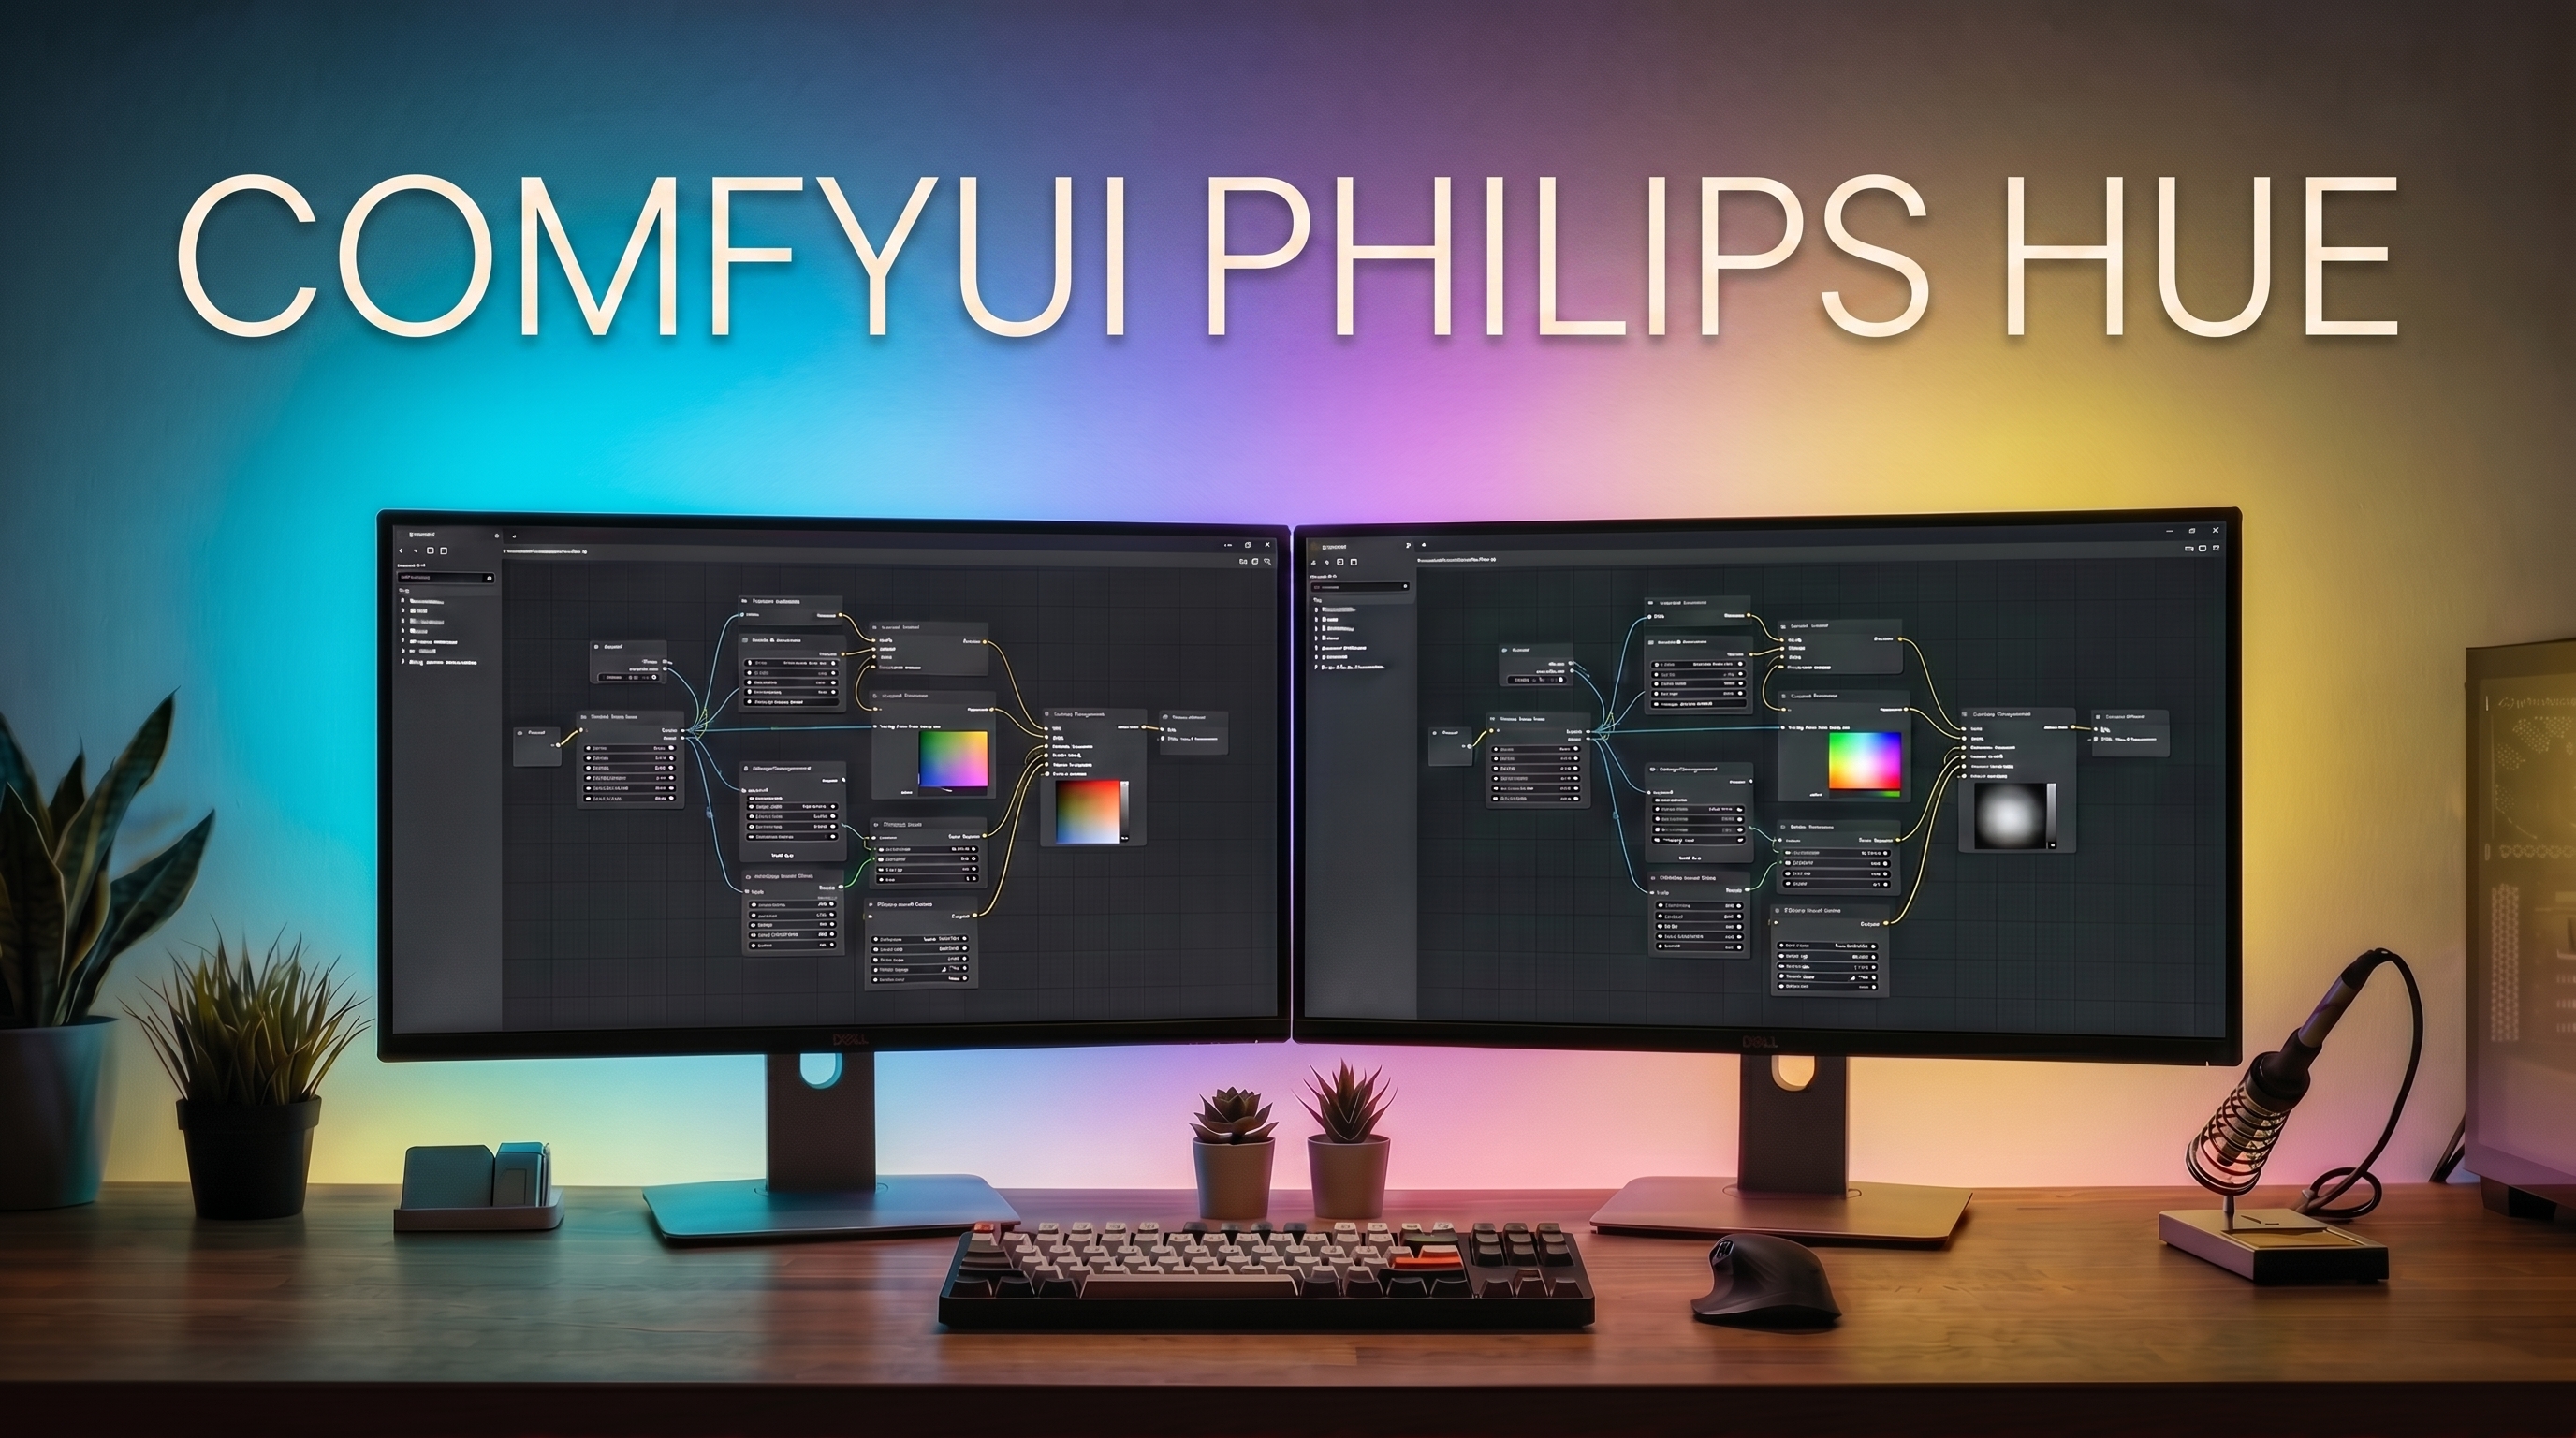
ComfyUI custom nodes that sample the edge colors of generated images and send matching colors to Philips Hue lights or Hue light strips.
Finally, ComfyUI is entering the physical world. Now you can control your home lights directly from a ComfyUI workflow.
It is easy: generate an image, let the node read the image edges, and have your lights match the mood of the result.
The package includes a full advanced node, a simpler everyday node, a manual color picker node, and a Hue setup node for bridge registration and light discovery.
Nodes
The package registers four public ComfyUI nodes.
Niutonian: Hue Setup
Use this node to find your Hue bridge, register an API key, list lights, and test the connection.
Actions:
auto_scan: finds Hue bridge IP addresses.register_new: registers this ComfyUI node with a Hue bridge.check_connection: checks the saved API key.list_lights: lists numeric Hue light IDs.test_flash: flashes all lights on the selected bridge.
list_lights also prints the detected light type and capabilities, such as
color_xy, hue_sat, white_temperature, or brightness.
Niutonian: Philips Hue Color Picker
Manual color control for Hue lights.
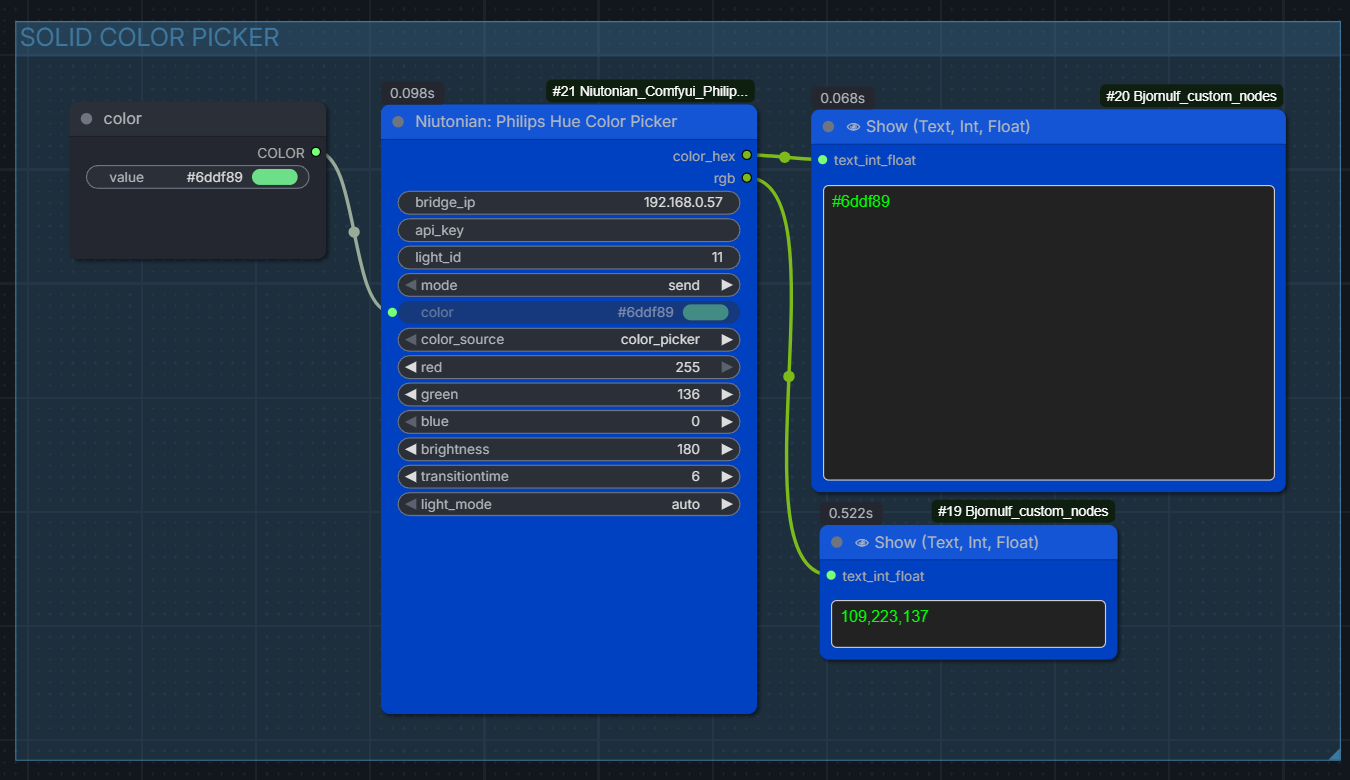
Inputs:
bridge_ip: Hue bridge IP.api_key: optional. Leave blank after setup.light_id: Hue light ID,all, orgroup:<id>.mode:send,preview_only, orturn_off.color: native ComfyUI color picker, default#ff8800.color_source: usecolor_pickerorrgb_sliders.red,green,blue: RGB sliders whencolor_source = rgb_sliders.brightness: Hue brightness from1to254.transitiontime: fade time in 1/10 second units.light_mode:auto,color_xy,hue_sat,white_temperature, orbrightness_only.
Use this node when you want direct manual light control instead of sampling an image.
Niutonian: ComfyUI Hue Edge Bar simple
Recommended node for normal use.
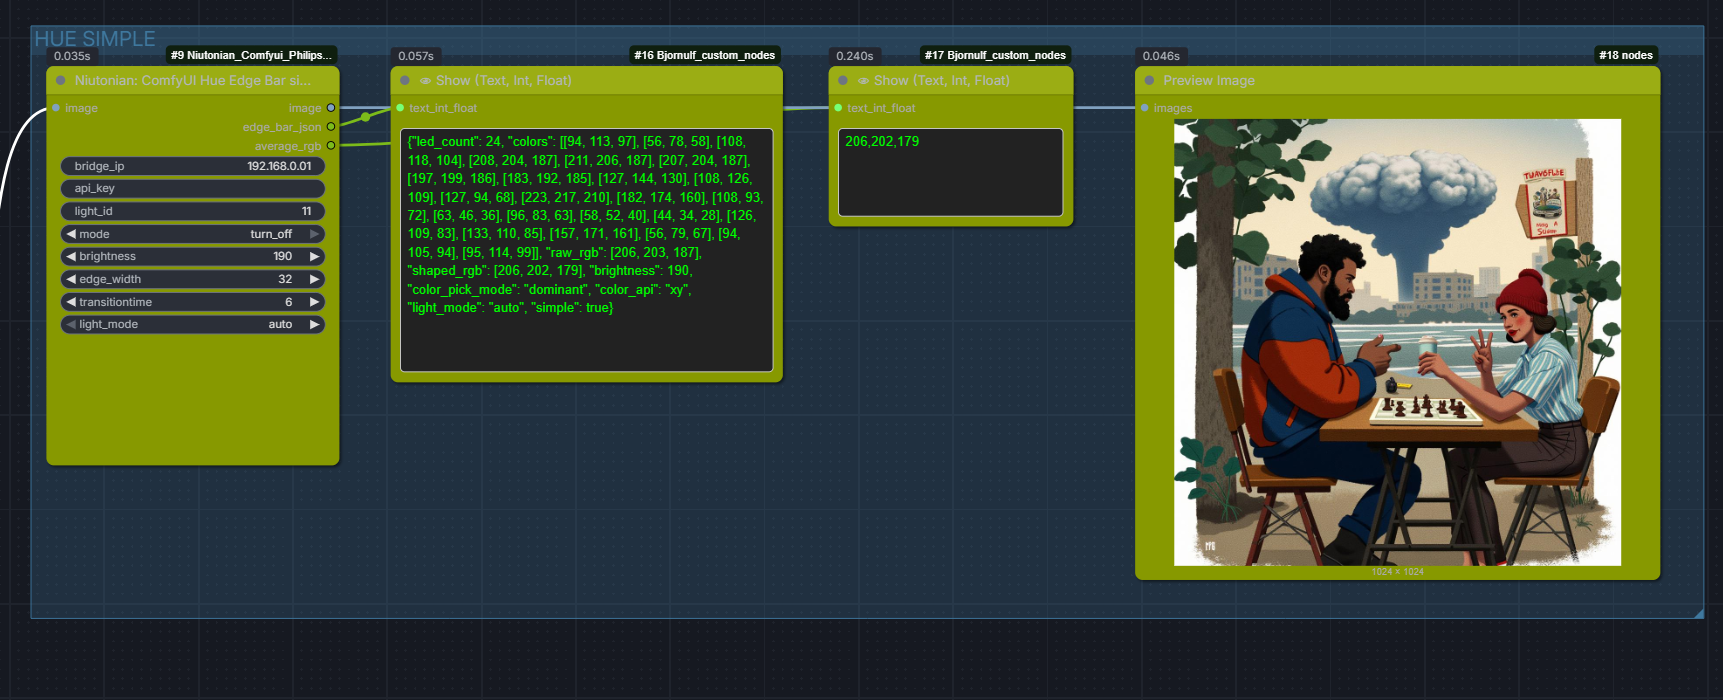
Inputs:
image: ComfyUI image input.bridge_ip: Hue bridge IP, for example192.168.1.100.api_key: optional. Leave blank after setup.light_id: Hue light ID,all, orgroup:<id>.mode:send,preview_only, orturn_off.brightness: Hue brightness from1to254.edge_width: how many pixels from the image border to sample.transitiontime: fade time in 1/10 second units.6means 0.6 seconds.light_mode: useautofor most lights.
The simple node uses good defaults internally:
- Hue
xycolor for better color matching. - Dominant edge color selection.
- Mild border filtering.
- Slight crop to avoid hard image borders.
- Mild vibrance and saturation shaping.
Niutonian: ComfyUI Hue Edge Bar
Advanced node with additional controls:
color_api:xyorhue_sat.color_pick_mode:average,weighted_average,dominant,brightest.brightness_mode:fixed,from_image,from_image_clamped.light_mode:auto,color_xy,hue_sat,white_temperature,brightness_only.crop_percentignore_dark_belowignore_bright_abovesaturation_boostvibrancemin_saturationmax_saturationtop_weight,right_weight,bottom_weight,left_weighttransitiontime
Installation
Copy this folder into your ComfyUI custom nodes directory:
ComfyUI/custom_nodes/Niutonian_Comfyui_Philips_Hue
For ComfyUI portable on Windows, that often looks like:
ComfyUI_windows_portable/ComfyUI/custom_nodes/Niutonian_Comfyui_Philips_Hue
Restart ComfyUI after copying the folder.
No extra Python packages are required.
Step-by-Step Hue Setup
1. Find Your Hue Bridge
Add the node:
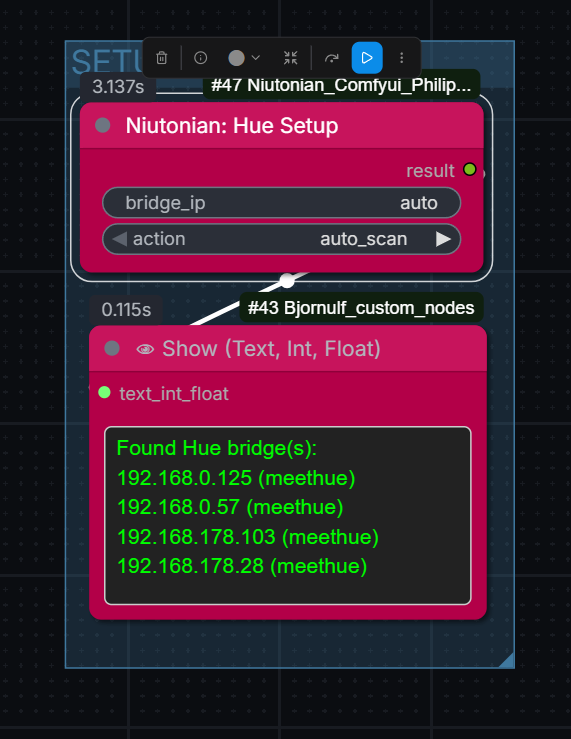
Niutonian: Hue Setup
Set:
bridge_ip = auto
action = auto_scan
Queue the prompt.
The output should look similar to:
Found Hue bridge(s):
192.168.1.100 (meethue)
If more than one bridge is found, choose the one that controls your Hue strip or
room lights. Put that exact IP into bridge_ip for the next steps.
2. Register ComfyUI With the Hue Bridge
Press the physical button on top of the Philips Hue Bridge.
Then run Niutonian: Hue Setup with:
bridge_ip = 192.168.1.100
action = register_new
Replace 192.168.1.100 with your bridge IP.
If registration succeeds, the node saves an API key in:
Niutonian_Comfyui_Philips_Hue/hue_config.json
Do not upload hue_config.json to GitHub. It is ignored by this repository's
.gitignore.
3. List Your Hue Lights
Run Niutonian: Hue Setup with:
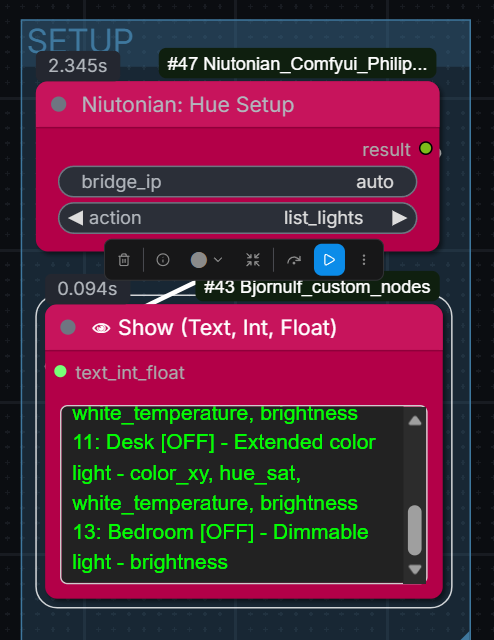
bridge_ip = 192.168.1.100
action = list_lights
The output will include light IDs:
1: Hue lightstrip plus [ON] - Extended color light - color_xy, hue_sat, white_temperature, brightness
2: Desk lamp [OFF] - Dimmable light - brightness
3: Hue ambiance bulb [ON] - Color temperature light - white_temperature, brightness
Write down the numeric ID for the light or strip you want to control.
4. Test the Bridge
Run:
bridge_ip = 192.168.1.100
action = test_flash
Your Hue lights should flash briefly.
5. Use the Simple Edge Bar Node
Add:
Niutonian: ComfyUI Hue Edge Bar simple
Connect your generated image to the image input.
Recommended settings:
bridge_ip = 192.168.1.100
api_key =
light_id = 1
mode = send
brightness = 180
edge_width = 32
transitiontime = 6
Leave api_key blank. The node loads the saved key from hue_config.json.
Use your actual light_id from the list_lights step.
Controlling Multiple Lights
The light_id field accepts:
1
Controls a specific light by ID.
all
Controls all lights on the bridge.
group:3
Controls Hue group ID 3.
To find group IDs, use the Hue app or the Hue API. The setup node currently lists lights, not groups.
Supported Hue Light Types
The nodes are not limited to Hue LED strips.
- Color lights and light strips: use
xycolor by default. - Older color lights: can use
hue_sat. - White ambiance lights: use
white_temperature. - Dimmable-only lights: use
brightness_only.
Set light_mode = auto unless you need to force a specific command type. In
auto mode, the node inspects the selected light and chooses the best supported
Hue command. For all and group:<id>, auto mode assumes color-capable lights
because the Hue v1 group endpoint does not expose one specific light's state.
Recommended Settings
For most users:
Node: Niutonian: ComfyUI Hue Edge Bar simple
mode = send
brightness = 160 to 210
edge_width = 24 to 48
transitiontime = 6 to 12
If the light feels too jumpy, increase transitiontime.
If colors feel too influenced by black image borders, increase edge_width or
use the advanced node with ignore_dark_below.
If colors feel too gray, use the advanced node and increase vibrance or
saturation_boost.
For white ambiance or dimmable-only lights, set light_mode = auto or choose
white_temperature / brightness_only directly.
How Color Output Works
The node samples colors around the image perimeter and builds a virtual LED bar. Standard Philips Hue v1 light control accepts one active color per light or group, so the node sends one selected edge color to the selected Hue light.
The node also returns:
edge_bar_json: the virtual LED bar and debug data.average_rgb: the final RGB color sent through the Hue conversion.
Troubleshooting
Auto Scan Finds Multiple Bridges
Use the exact bridge IP instead of auto.
Example:
bridge_ip = 192.168.1.100
Register Says to Press the Button
Press the physical Hue Bridge button and run register_new again within about
30 seconds.
No API Key Found
Run:
Niutonian: Hue Setup
action = register_new
Then leave api_key blank in the edge bar node.
Light Does Not Change Color
Check:
- The bridge IP is correct.
- The
light_idmatches the Hue strip or light. modeis set tosend.- The light is reachable in the Hue app.
test_flashworks from the setup node.
Colors Look Wrong
Try:
- Use
Niutonian: ComfyUI Hue Edge Bar simplefirst. - Increase
transitiontimefor smoother fades. - Try the advanced node with
color_pick_mode = weighted_average. - Use
color_api = xyfor better Hue color matching.
Security Notes
The Hue API key allows local control of your Hue bridge. Keep this file private:
hue_config.json
Do not commit it to GitHub.
Compatibility
- Philips Hue Bridge local v1 API.
- ComfyUI custom node system.
- Windows portable ComfyUI and normal ComfyUI installs.
No third-party Python dependencies are required.
Run ComfyUI workflows without the setup
No installs, no CUDA version roulette, no GPU sitting idle on your bill. Bring a workflow and run it in the browser.